For an even faster start, clone or download the worker-basic repository for a pre-configured template for building and deploying Serverless workers. After cloning the repository, skip to step 6 of this tutorial to deploy and test the endpoint.
Requirements
Step 1: Create project files
Create a new directory with empty files for your project:
mkdir serverless-quickstart && cd serverless-quickstart
touch handler.py Dockerfile requirements.txt test_input.json
Step 2: Install the Serverless SDK
Create a virtual environment and install the Serverless SDK
python3 -m venv .venv
source .venv/bin/activate
pip install runpod
Step 3: Create a handler function
Add the following code to handler.py:
import runpod
import time
def handler(event):
# This function processes incoming requests to your Serverless endpoint.
#
# Args:
# event (dict): Contains the input data and request metadata
#
# Returns:
# Any: The result to be returned to the client
# Extract input data
print(f"Worker Start")
input = event['input']
prompt = input.get('prompt')
seconds = input.get('seconds', 0)
print(f"Received prompt: {prompt}")
print(f"Sleeping for {seconds} seconds...")
# You can replace this sleep call with your own Python code
time.sleep(seconds)
return prompt
# Start the Serverless function when the script is run
if __name__ == '__main__':
runpod.serverless.start({'handler': handler })
This is a bare-bones handler that processes a JSON object and outputs a prompt string contained in the input object.
You can replace the time.sleep(seconds) call with your own Python code for generating images, text, or running any AI/ML workload.
Add the following code to test_input.json to properly test your handler locally:
{
"input": {
"prompt": "Hey there!"
}
}
Step 5: Test your handler function locally
Run your handler function using your local terminal:
You should see output similar to this:
--- Starting Serverless Worker | Version 1.7.9 ---
INFO | Using test_input.json as job input.
DEBUG | Retrieved local job: {'input': {'prompt': 'Hey there!'}, 'id': 'local_test'}
INFO | local_test | Started.
Worker Start
Received prompt: Hey there!
Sleeping for 0 seconds...
DEBUG | local_test | Handler output: Hey there!
DEBUG | local_test | run_job return: {'output': 'Hey there!'}
INFO | Job local_test completed successfully.
INFO | Job result: {'output': 'Hey there!'}
INFO | Local testing complete, exiting.
Step 6: Create a Dockerfile
Add the following content to Dockerfile:
FROM python:3.10-slim
WORKDIR /
# Install dependencies
RUN pip install --no-cache-dir runpod
# Copy your handler file
COPY handler.py /
# Start the container
CMD ["python3", "-u", "handler.py"]
Step 7: Build and push your worker image
Before you can deploy your worker on Runpod Serverless, you need to push it to Docker Hub:
Build your Docker image
Build your Docker image, specifying the platform for Runpod deployment, replacing [YOUR_USERNAME] with your Docker username:docker build --platform linux/amd64 --tag [YOUR_USERNAME]/serverless-test .
Push the image to your container registry
docker push [YOUR_USERNAME]/serverless-test:latest
Step 8: Deploy your worker using the Runpod console
To deploy your worker to a Serverless endpoint:
- Go to the Serverless section of the Runpod console.
- Click New Endpoint.
- Click Import from Docker Registry
- In the Container Image field, enter your Docker image URL:
docker.io/yourusername/serverless-test:latest.
- Click Next to proceed to endpoint configuration.
- Configure your endpoint settings:
- (Optional) Enter a custom name for your endpoint, or use the randomly generated name.
- Make sure the Endpoint Type is set to Queue.
- Under GPU Configuration, check the box for 16 GB GPUs.
- Leave the rest of the settings at their defaults.
- Click Deploy Endpoint.
The system will redirect you to a dedicated detail page for your new endpoint.
Step 9: Test your endpoint
To test your endpoint, click the Requests tab in the endpoint detail page:
On the left you should see the default test request:
{
"input": {
"prompt": "Hello World"
}
}
Leave the default input as is and click Run. The system will take a few minutes to initialize your workers.
When the workers finish processing your request, you should see output on the right side of the page similar to this:
{
"delayTime": 15088,
"executionTime": 60,
"id": "04f01223-4aa2-40df-bdab-37e5caa43cbe-u1",
"output": "Hello World",
"status": "COMPLETED",
"workerId": "uhbbfre73gqjwh"
}
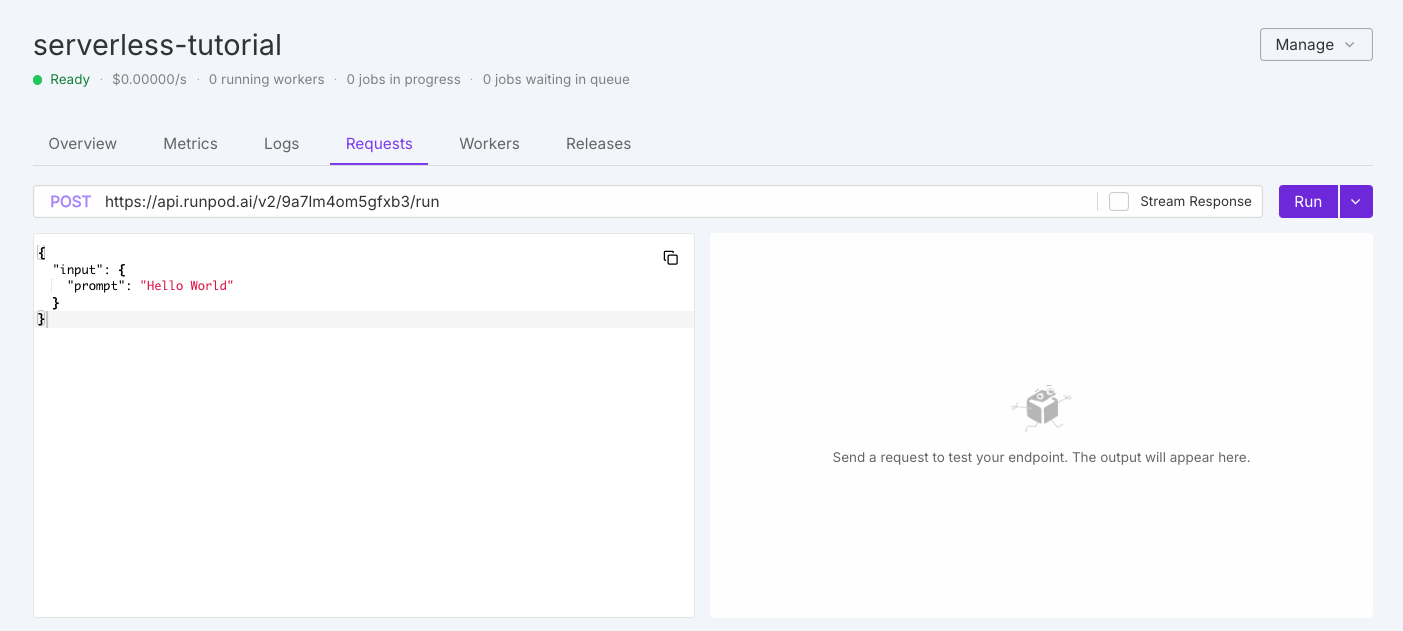
Congratulations! You’ve successfully deployed and tested your first Serverless endpoint.
Next steps