How requests work
A job is a unit of work containing the input data from the request, packaged for processing by your workers. If no worker is immediately available, the job is queued. Once a worker is available, the job is processed using your worker’s handler function.Sync vs. async
/runsyncsubmits a synchronous job.- Client waits for the job to complete before returning the result.
- Results are available for 1 minute (5 minutes max).
- Ideal for quick responses and interactive applications.
/runsubmits an asynchronous job.- The job processes in the background; retrieve results via
/status. - Results are available for 30 minutes after completion.
- Ideal for long-running tasks and batch processing.
- The job processes in the background; retrieve results via
Request input structure
When submitting a job with/runsync or /run, your request must include a JSON object with the key input containing the parameters required by your worker’s handler function:
Send requests from the console
The quickest way to test your endpoint is in the Runpod console. Navigate to Serverless, select your endpoint, and click the Requests tab.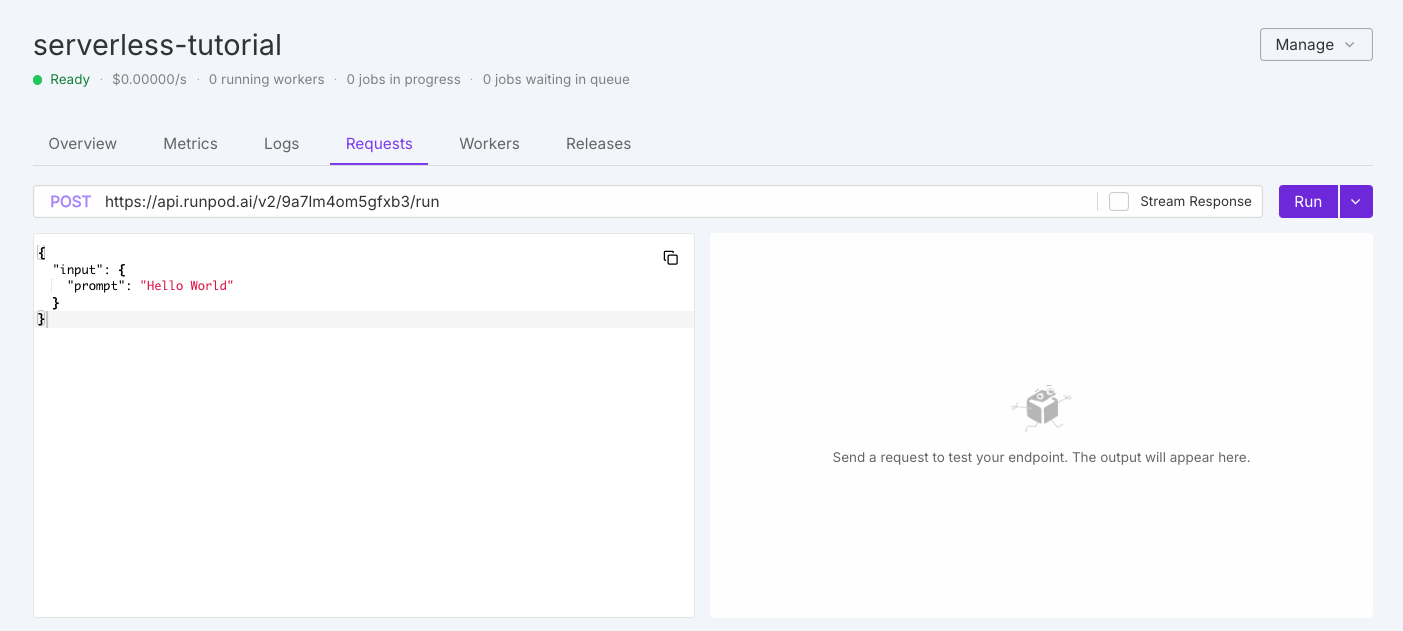
Operation overview
Queue-based endpoints support these operations for job lifecycle management:
See the operation reference for detailed examples using cURL and the Runpod SDK.
Advanced options
Beyond the requiredinput object, you can include optional top-level parameters for additional functionality.
Webhook notifications
Receive notifications when jobs complete by specifying a webhook URL:200 status code. If the call fails, Runpod retries up to 2 more times with a 10-second delay.
Execution policies
Control job execution behavior with custom policies:Setting
executionTimeout in a request overrides the default endpoint setting for that specific job only.TTL vs. execution timeout
ttl: Total lifespan of the job. Timer starts when submitted and covers queue time, execution time, and everything in between. When TTL expires, the job is deleted regardless of state.executionTimeout: Maximum time the job can actively run once a worker picks it up. Only enforced during execution.
Long-running jobs
For jobs that need to run longer than the default 24-hour TTL:- Set
executionTimeoutto your desired maximum runtime. - Set
ttlto cover both expected queue time and execution time.
Result retention
After completion, results are retained for a fixed period separate from TTL:S3-compatible storage
Configure S3-compatible storage for endpoints working with large files:Rate limits
Runpod enforces rate limits per endpoint and operation:Dynamic rate limiting
Rate limits scale with your endpoint’s worker count. The system uses whichever is higher between:- Base limit: Fixed rate limit per user per endpoint (shown above)
- Worker-based limit:
number_of_running_workers × requests_per_worker
429 (Too Many Requests). Implement retry logic with exponential backoff to handle rate limiting gracefully.
Error handling
Common errors and solutions:
See error handling for implementation details.