Requirements
- A Runpod account with credits.
- A Runpod API key.
Step 1: Deploy an endpoint from the Hub
The Runpod Hub provides pre-built workers you can deploy with a few clicks. For this tutorial, you’ll deploy the SDXL Turbo worker, which generates images from text prompts.- Navigate to the Runpod Hub in the console.
- Search for “SDXL-turbo” or browse the image generation category.
- Select the SDXL-turbo worker to view its details and hardware requirements.
- Click Deploy in the top-right corner of the page.
- Click Create Endpoint.
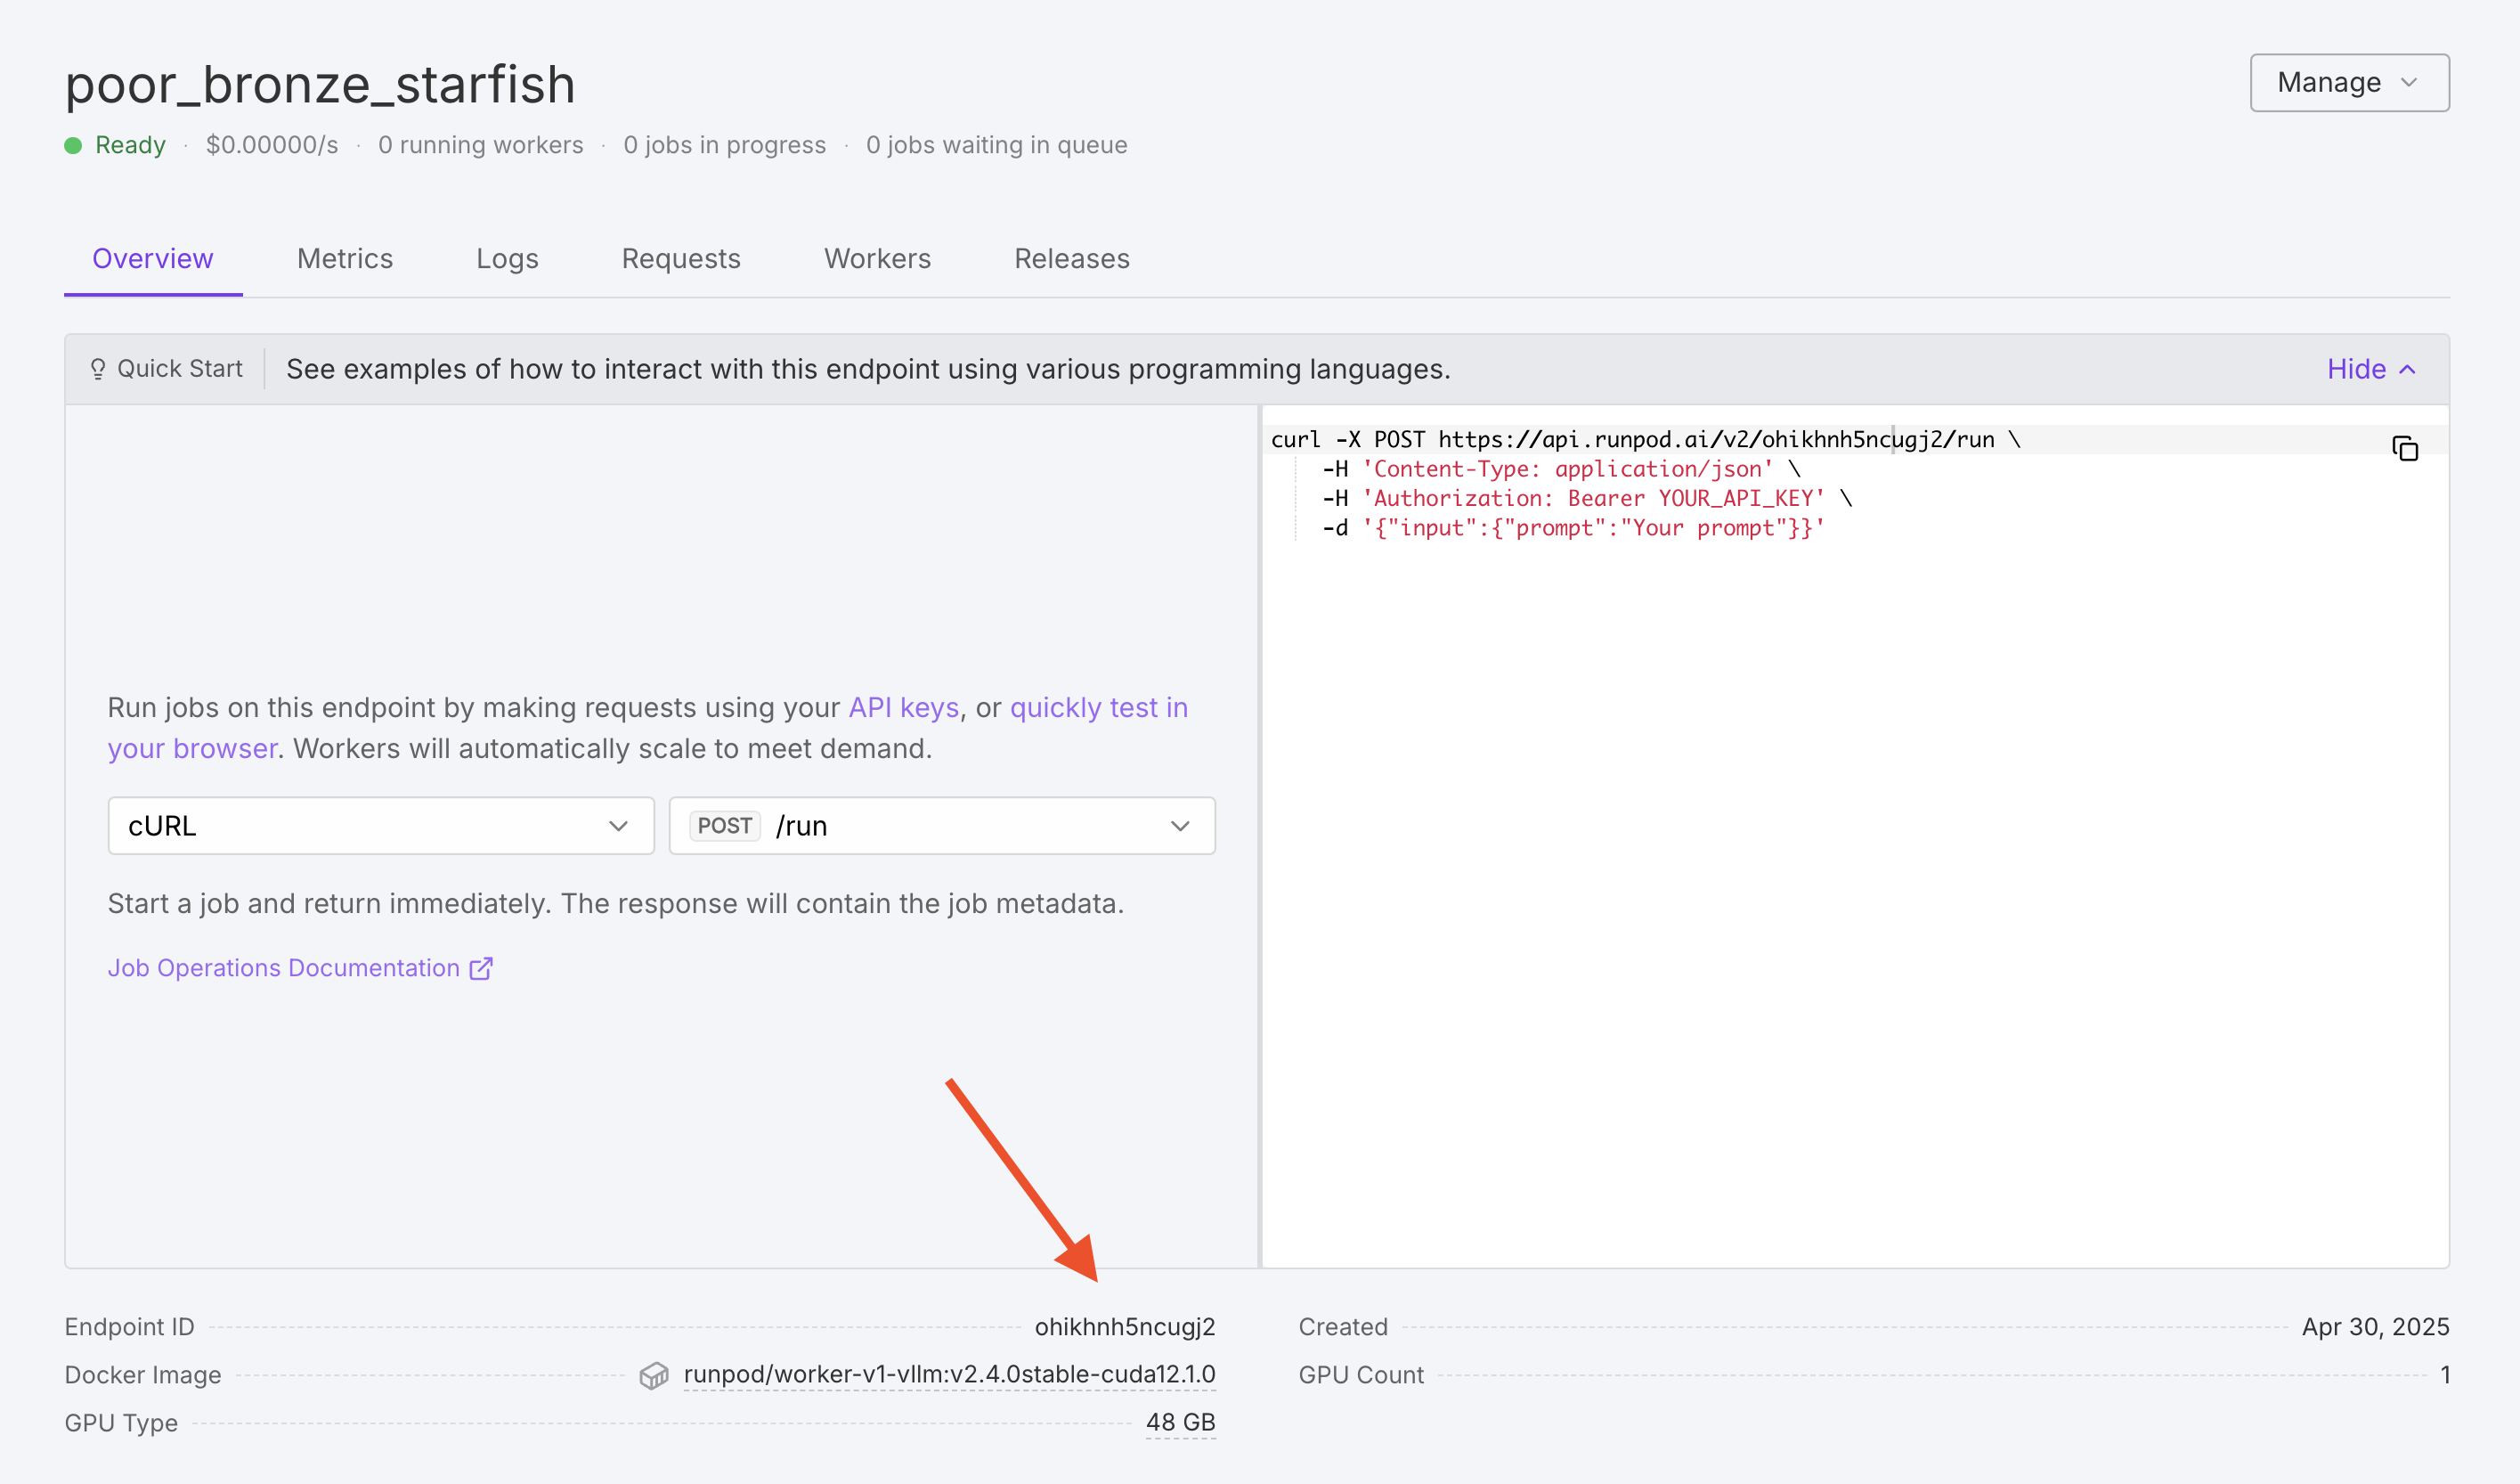
Step 2: Find your endpoint ID and API key
Now that your endpoint is deployed, you’ll need your endpoint ID and API key to make requests.Find your endpoint ID
- Go to your Serverless endpoints page.
- Click on your SDXL Turbo endpoint.
- Copy the Endpoint ID shown at the top of the page.
Find your API key
- Navigate to Settings > API Keys in the console, or go directly to the API Keys page.
- Copy an existing API key, or create a new one with read and write permissions.
Step 3: Send a test request
Test your endpoint with a simple API request before integrating it into an application. The endpoint accepts a JSON payload with aninput object containing your prompt.
- cURL
- Python
- Response
The generated image is returned as a base64-encoded PNG string in
output.images[0].image. For more information about request parameters and response formats, see Send requests.
SDXL Turbo uses adversarial diffusion distillation to generate images in just a few steps. The worker is pre-configured with optimal settings, so you only need to provide the prompt parameter, but you can also provide other parameters to control the generation process.
Step 4: Integrate with a web application
Now that you’ve confirmed your endpoint is working, you can integrate it into a web application. This example creates a simple image generator with an input field for prompts and a button to generate images. While this tutorial uses JavaScript, you can make requests to your endpoint using any programming language or framework. Create two files in the same directory:- index.html
- script.js
The HTML file sets up a user interface with an input field for prompts and a button to generate images. Clicking the button calls the
generateImage function in script.js.index.html
- Replace
YOUR_ENDPOINT_IDwith your endpoint ID from step 2. - Replace
YOUR_API_KEYwith your Runpod API key.
Step 5: Run your application
You can run the application using a local server or by opening the HTML file directly in a browser.- Python server
- Open directly
Run the following command in the directory containing your files:Then open
http://localhost:8000 in your browser.Next steps
Now that you’ve integrated a Serverless endpoint into a web application, you can:- Explore other workers on the Hub for different AI capabilities.
- Learn about asynchronous requests for handling long-running jobs.
- Build your own custom worker to deploy your own models.
- Use the Python SDK for more advanced integrations.