> ## Documentation Index
> Fetch the complete documentation index at: https://docs.runpod.io/llms.txt
> Use this file to discover all available pages before exploring further.
# Connection options
> Explore Pod connection options, including the web terminal, SSH, JupyterLab, and VSCode/Cursor.
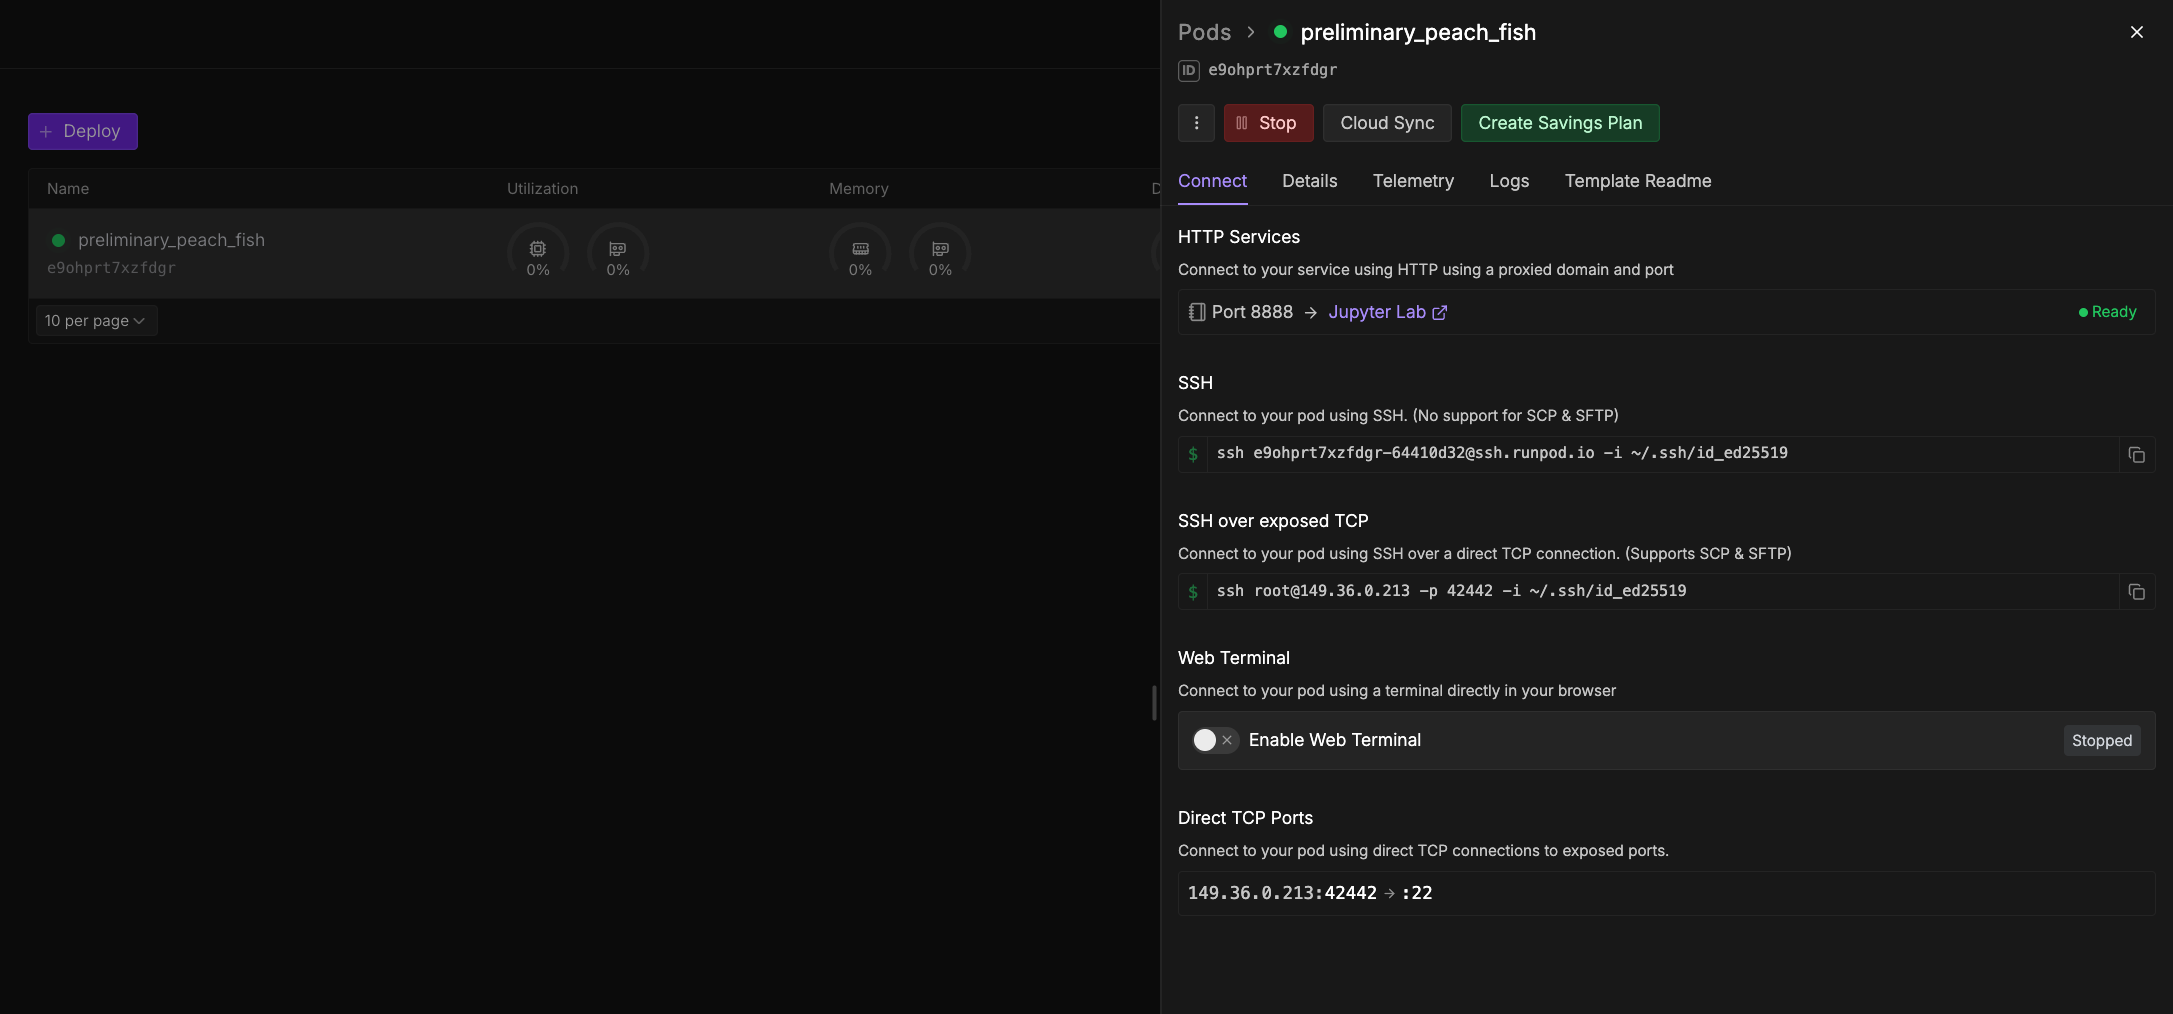 Choose a connection method based on your workflow:
| Method | Best for | Persistence | Setup |
| ------------------ | --------------------------------------- | ------------- | ------------------ |
| **Web terminal** | Quick commands, debugging | Session-based | None |
| **SSH** | Long-running processes, reliable access | Persistent | SSH client |
| **JupyterLab** | Data science, notebooks | Session-based | Template-dependent |
| **VS Code/Cursor** | Full development environment | Persistent | Extension |
## Web terminal
Browser-based terminal for quick access. Not recommended for long-running processes (use [SSH](#ssh) instead).
1. Navigate to the [Pods page](https://console.runpod.io/pods).
2. Expand your Pod and click **Connect**.
3. Click **Start** if the terminal is stopped, then **Open Web Terminal**.
If **Start** doesn't respond, refresh the page.
## JupyterLab
Interactive web environment for code, files, and data analysis. Available on templates with JupyterLab pre-configured (e.g., "Runpod Pytorch").
1. Deploy a Pod with a JupyterLab-compatible template (all official Runpod PyTorch templates have JupyterLab pre-configured).
2. Navigate to the [Pods page](https://console.runpod.io/pods) and click **Connect**.
3. Under **HTTP Services**, click the **Jupyter Lab** link (usually port 8888).
Create a Pod with JupyterLab access using the CLI:
```bash theme={"theme":{"light":"github-light","dark":"github-dark"}}
runpodctl pod create \
--name my-jupyter-pod \
--gpu-id "NVIDIA GeForce RTX 4090" \
--image "runpod/pytorch:2.1.0-py3.10-cuda11.8.0-devel-ubuntu22.04" \
--container-disk-in-gb 20 \
--volume-in-gb 50 \
--ports "8888/http" \
--env '{"JUPYTER_PASSWORD":"your_secure_password"}'
```
After the Pod starts, access JupyterLab at `https://[POD_ID]-8888.proxy.runpod.net`.
Set the `JUPYTER_PASSWORD` environment variable to configure JupyterLab authentication. If not set, some templates use a default password shown in the Pod logs.
If the JupyterLab tab displays a blank page for more than a minute or two, try restarting the Pod and opening it again.
## SSH
Secure, reliable command-line access for long-running processes and development.
See [Connect with SSH](/pods/configuration/use-ssh) for setup instructions.
## VS Code / Cursor
Connect your local IDE directly to your Pod for a full development experience.
See [Connect to VS Code or Cursor](/pods/configuration/connect-to-ide) for setup instructions.
Choose a connection method based on your workflow:
| Method | Best for | Persistence | Setup |
| ------------------ | --------------------------------------- | ------------- | ------------------ |
| **Web terminal** | Quick commands, debugging | Session-based | None |
| **SSH** | Long-running processes, reliable access | Persistent | SSH client |
| **JupyterLab** | Data science, notebooks | Session-based | Template-dependent |
| **VS Code/Cursor** | Full development environment | Persistent | Extension |
## Web terminal
Browser-based terminal for quick access. Not recommended for long-running processes (use [SSH](#ssh) instead).
1. Navigate to the [Pods page](https://console.runpod.io/pods).
2. Expand your Pod and click **Connect**.
3. Click **Start** if the terminal is stopped, then **Open Web Terminal**.
If **Start** doesn't respond, refresh the page.
## JupyterLab
Interactive web environment for code, files, and data analysis. Available on templates with JupyterLab pre-configured (e.g., "Runpod Pytorch").
1. Deploy a Pod with a JupyterLab-compatible template (all official Runpod PyTorch templates have JupyterLab pre-configured).
2. Navigate to the [Pods page](https://console.runpod.io/pods) and click **Connect**.
3. Under **HTTP Services**, click the **Jupyter Lab** link (usually port 8888).
Create a Pod with JupyterLab access using the CLI:
```bash theme={"theme":{"light":"github-light","dark":"github-dark"}}
runpodctl pod create \
--name my-jupyter-pod \
--gpu-id "NVIDIA GeForce RTX 4090" \
--image "runpod/pytorch:2.1.0-py3.10-cuda11.8.0-devel-ubuntu22.04" \
--container-disk-in-gb 20 \
--volume-in-gb 50 \
--ports "8888/http" \
--env '{"JUPYTER_PASSWORD":"your_secure_password"}'
```
After the Pod starts, access JupyterLab at `https://[POD_ID]-8888.proxy.runpod.net`.
Set the `JUPYTER_PASSWORD` environment variable to configure JupyterLab authentication. If not set, some templates use a default password shown in the Pod logs.
If the JupyterLab tab displays a blank page for more than a minute or two, try restarting the Pod and opening it again.
## SSH
Secure, reliable command-line access for long-running processes and development.
See [Connect with SSH](/pods/configuration/use-ssh) for setup instructions.
## VS Code / Cursor
Connect your local IDE directly to your Pod for a full development experience.
See [Connect to VS Code or Cursor](/pods/configuration/connect-to-ide) for setup instructions.